The Silhouette is a photo with the main object of total darkness with a bright background, so that is visible is the shape of the main object earlier. Photographing the silhouette is not as difficult as imagined, as long as you know the steps and tips him.
Turn off FlashThe first and foremost is the flash on the camera should be turned off, otherwise you will get regular photos (because its main object is not so dark). So turn off the flash on your camera
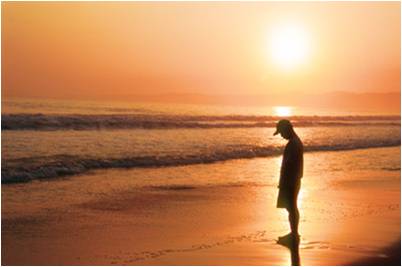
Find the right lighting conditions (backlight)To generate a silhouette, the background you need more light than the main object. That is why most of silhouette images when the sunset or sunrise done, where the sun (light source) is behind the object that you want the photo (backlighting). But do not limit yourself, silhouette image can be produced at any time, in essence, you just have to find a background that is lighter than the main object.
Look for an object that looks interestingPhoto silhouette will really show form the main object, therefore, look for objects with interesting shapes and has a strong character. Note the photo above, because the main object (fish finder) lose detail and become very dark, the shape it will be more exposed. We can see clearly the limits of the curve of the fisherman's body shape, the form of nets and their frames until the droplets of water coming out of the net. You can also try with another object.
Find the appropriate backgroundTo get a silhouette you should find a lighter background. Try also to get an interesting background, but also not crowded so that the main object seen very prominent. The sky and the beach is a favorite example.
Measure exposure to the right (manual / auto)Wherever possible use the manual mode eskposur. Set metering in spot metering. Perform measurements in the background of the most light. In the example photo above to measure the light the sky above my helmet. Change the combination of aperture and shutter speed according to the results of your metering, particularly in the aperture make sure you set your own (large aperture for the background is somewhat blurry and small aperture for the sharp background). After you set the aperture and shutter speed selected, point the camera to the main object. Arrange the best composition and determine the focus on the main object and then snap ....
If you can not use the manual mode, use auto mode. Point the camera towards the brightest area, in the example above is to the sky above the fish finder, Click your shutter half (do not push the full), then hold the shutter is not released. Then point the camera to your main object and then snap ....

Do not be afraid to tryTry a combination of aperture and shutter speed are different if you fail at the first opportunity. Try also experimenting with the object and your environment, do not just stare at the sunset and sunrise, because the silhouette image can be produced anywhere

0 komentar:
Posting Komentar